
A shingle roof looks simple from the street, but a good installation is anything but. It is a choreographed sequence that blends planning, technique, and timing. If you know what to expect on installation day, you can prepare your home, keep the crew moving efficiently, and recognize the difference between a tidy job and one that might cause headaches later. What follows is a candid walk-through of the roof shingle installation process, with practical notes I’ve learned from spending years on ladders, in attics, and on hot decks with a nail gun in hand.
The week before: materials, weather, and a quick reality check
Good shingle roofing starts with logistics. A reputable shingle roofing contractor will confirm product selections and delivery timing a few days in advance. Expect a truck to drop shingles, underlayment, ridge vents, and accessories either in your driveway or, if your structure allows, boom them directly to the roof. If the load sits on the ground, make sure the pallet location doesn’t block your garage or create a blind spot near the street. Tell the supplier about sprinkler heads and underground lines near the driveway so the truck doesn’t crush them.
Weather drives the calendar. Shingle roofing is forgiving compared to tile or metal, but it has limits. We avoid tearing off a roof when heavy rain is forecast, and we watch temperature bands: most shingle manufacturers recommend installing when ambient temperatures are above 40 to 45 degrees Fahrenheit so sealant strips can activate and the shingles lay flat. Cold installations are possible with extra care and a warmer stretch on the horizon, but brittle shingles crack more easily, and seal-down can lag by days or weeks. In high heat, the crew paces themselves, nails can overdrive, and underlayment becomes slippery, so more staging and fall protection is used.
If you’re planning roof shingle replacement, ask your contractor about dumpster placement and local permits. People forget this detail, then scramble when the hauler blocks a neighbor’s mailbox or a city inspector shows up. A 10 to 20-yard container handles most single-family tear-offs. On smaller lots we sometimes use a dump trailer positioned under the eaves to catch debris directly, which keeps your landscaping safer.
The morning of: arrival, protection, and safety setup
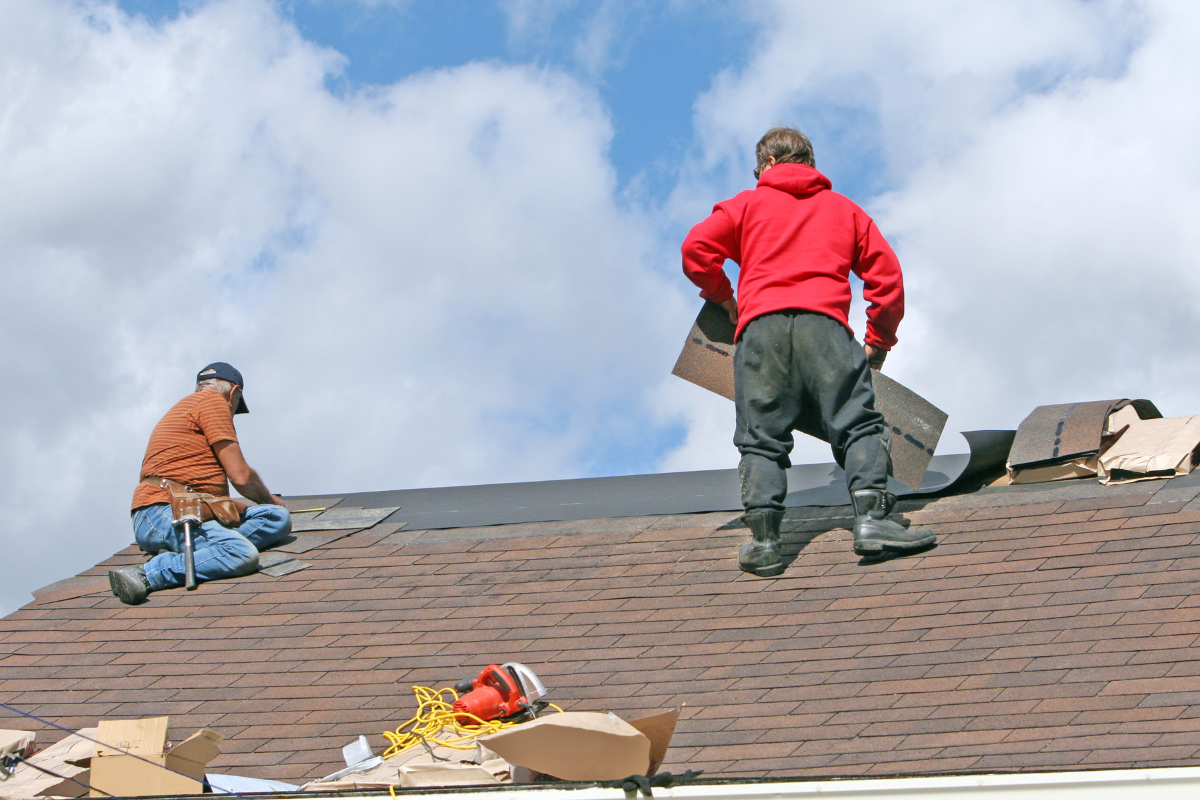
Crews tend to arrive early, especially in warm climates. The first 30 to 60 minutes are about staging. Ladders go up, ropes and anchors are installed, and tarps spread over shrubs, AC condensers, and any outdoor furniture. A conscientious crew will move potted plants out of the drop zone and protect delicate flower beds with plywood leaned like a shield. They will also run magnetic rollers across the yard at the end of each day to collect nails, but that first tarp layer matters more than people realize.
Power tools draw from one or two outdoor outlets. If your GFCI trips easily or is shared with a refrigerator in the garage, let the crew know and they’ll spread the load to a different circuit. Pets do better indoors, and parked cars should be moved out of the driveway before the dumpster and material truck arrive. If you have an attic fan or satellite dish that matters to you, mention it to the foreman at the start. Adjusting a dish by a quarter inch can throw off your signal, and roofing crews sometimes loosen them to install new flashings.
Expect noise. Tear-off and deck repairs sound like someone is bowling on the roof. If you work from home, plan calls away from the house during the noisiest stretch.
Tear-off: the messy part that makes all the difference
For a true roof shingle replacement, the old roof comes off first. Some homes have only one layer of shingles. Others, especially older ones, may have two or even three layers stacked. Building codes in many regions allow two layers, but most licensed crews still recommend a complete tear-off for the new system. Fresh deck inspection is the reason: rot and soft spots hide under shingles, and a new roof is only as strong as the wood beneath it.
The crew will start at the ridge and work downward, prying up shingles and flashing with shingle shovels. Valleys collect debris and slow the process. If the roof has cedar shake under an existing asphalt layer, the tear-off gets more complex. Shakes were once installed over skip sheathing, essentially boards with open gaps. To install modern asphalt shingles, the crew needs to overlay the skip sheathing with plywood or OSB for a continuous surface, which adds cost, time, and weight calculations. In that case, plan for your installation day to spill into a second day.
While shingles are off, a professional will check decking with a combination of sightlines and foot pressure. Soft areas around chimneys, vent stacks, and low-slope transitions are common. We replace rotted sections with the same thickness plywood or OSB, fastening to rafters or trusses with ring-shank nails or deck screws. Cutting out a 2 by 3 foot section might take 20 minutes, but skipping it is how future leaks begin.
An experienced shingle roofing contractor also verifies intake and exhaust ventilation during tear-off. Ventilation is not an upgrade, it is how the roof system sheds heat and moisture. If you have insulation stuffed against the eave, blocking soffit vents, or a large attic with only gable vents and no ridge vent, this is the moment to fix it. Better attic ventilation can drop attic temperatures by 10 to 20 degrees on hot days, which extends shingle life and improves comfort.
Dry-in: the weather shield before the shingles ever appear
Once the deck is cleared and repaired, we dry-in the roof to protect against pop-up showers. First, the drip edge goes on along the eaves, then an ice and water membrane is applied in critical zones. In colder climates, that self-adhered membrane may run two courses up from the eaves to cover at least 24 inches inside the warm wall, as codes require. Regardless of climate, we line valleys and wrap skylights and chimneys with this membrane. Ice and water shield is the unsung hero of roof shingle installation. It sticks directly to the wood and self-seals around nails, which buys time during storms and covers the vulnerable points of the roof system.
On open field areas, the crew rolls out synthetic underlayment, overlapping rows per the manufacturer’s spec, then caps it with plastic cap nails or staples with cap fasteners. Old-school felt still shows up, but synthetics are lighter, tougher, and safer to walk on. At the rakes, a second drip edge is installed after underlayment, creating a clean terminus for shingles and shedding water at the edges.
If rain threatens midday, crews often dry-in the entire roof before setting any shingles. It looks strange to a homeowner who imagined seeing rows of shingles by lunch, but it is the right call. A fully dried-in roof is weather-tight, even if shingles wait until the next morning.
Flashings and penetrations: the details that separate good from average
Flashing work happens before and during shingle installation. Expect your contractor to replace vent boots, counterflash chimneys, and renew step flashing along sidewalls. Heat and UV destroy rubber boots long before shingles fail, so reusing them is false economy. For chimneys, the best setups include a proper metal counterflashing cut into mortar joints, not just smeared sealant. Sealant is a helper, not a primary waterproofing layer.
Valleys deserve special attention. Closed-cut valleys with ice and water shield underneath are common and perform well, provided the cuts are straight and the shingle tabs are trimmed to avoid water catching points. Woven valleys look tidy on certain shingle styles but can trap debris on steep roofs with leaf fall. Exposed metal valleys are still the standard in heavy snow regions, especially with standing seams in the valley trough to direct meltwater. Your roof’s pitch, tree cover, and regional weather all play into the best choice.
Skylights are either a pleasure or a headache. If your unit is older than the roof, replacing it during roof shingle replacement is often smart. New glass has better seals and energy performance. At minimum, ask for the manufacturer’s flashing kit rather than a custom bend-up unless your installer is highly skilled at metalwork. Properly integrated skylights should survive decades of weather without a bead of exposed goop.
Shingle layout, nailing, and the craft of straight lines
When the dry-in is complete and flashing staged, we begin shingles at the eaves. Starter shingles go first, with factory adhesive strips positioned to lock the first course to the roof. It looks simple, yet skipping starters or installing them upside down can turn the eave into a wind entry point.
Crews snap chalk lines to keep courses straight and reveal consistent. That chalk work is visible from the ground. If the lines wander, eyes notice and wind finds weak points. High-quality shingle roofing relies on consistent nailing: correct nail count per shingle, nails placed within the manufacturer’s nailing zone, and proper depth. Overdriven nails cut into the mat, underdriven nails sit proud and can press through the course above. Either mistake voids warranties and shortens service life.
I have seen well-known brands fail early not because of the product but because of poor nailing. On blistering days, nail guns can overdrive as compressors warm up, so good crews check gun depth every hour and adjust as the temperature shifts. They also monitor seam offsets from course to course to avoid lining up joints. That offset pattern matters for water shedding and wind resistance.
Ridge vents and hip caps finish the look and function. If your roof previously had box vents and you upgrade to a continuous ridge vent, the crew will cut a slot along the ridge, leaving enough wood at hips and ridge transitions for structure. The vent’s external baffle accelerates air draw on breezy days, working in tandem with soffit vents below. No soffits, no exhaust. Ask your shingle roofing contractor to confirm that intake area meets or exceeds exhaust area, otherwise the ridge vent cannot do its job.
A typical day’s rhythm and how long it really takes
On an average one-story home with a straightforward gable roof and around 2,000 square feet of roof area, a six to eight person crew can often complete tear-off and lay new shingles in a single day, especially during long summer daylight. Add complexity like multiple valleys, dormers, skylights, or rot repair and you are looking at two days. Two-story homes with steep slopes often require extra staging and harness work, which slows production but improves safety, and may extend the project to three days.
The day flows like this. Early staging and protection, then tear-off in sections, then immediate dry-in of those sections. A foreman or quality lead follows behind, checking decks and marking repair areas. After lunch, shingle courses run quickly on the back side, then front, with valley cuts and flashings spliced in as the lines approach. Ridge caps and cleanup wrap the day. If sunset arrives before polishing touches are complete, crews will ensure the roof is watertight and return for a shorter session the next morning to finish caps, paint exposed flashings to match, and do a final magnet sweep.
What you will see, hear, and smell
Shingle removal releases a lot of granules and dust. Expect a gritty film on driveways and walkways during the day, followed by a thorough cleanup. Inside the home, you may hear fasteners tapping the decking above ceilings. It is normal for a few bits of old debris to fall through can light housings or around attic hatches, especially in older homes. If you have a delicate chandelier or a piano under a cathedral ceiling, cover it. On hot days, asphalt odors are noticeable but fade quickly once the shingles cool and the sealants cure.
Quality checkpoints a homeowner can verify from the ground
You do not need to climb on the roof to confirm some basics. Look for straight ridge lines without gaps between ridge caps. At the eaves and rakes, shingles should finish cleanly with a consistent overhang, typically around 3/8 to 1/2 inch beyond the drip edge. Downspouts should not be spitting out a handful of granules for weeks. A small initial flush is normal, a steady stream suggests aggressive brooming or scuffing during installation.
Where walls intersect the roof, look for new step flashing tucked under the siding or behind counterflashing, not just caulk smeared on top. Pipe boots should sit snug around the pipes with no visible cracks and the top edge of the boot should be covered by the shingle course above. If a satellite dish was detached, verify it was remounted properly and, if needed, re-aimed.
Repair or replace: how installation day differs for shingle roof repair
Not every project is a full roof shingle replacement. For targeted shingle roof repair, the day moves faster and the mess is localized. Repairs typically focus on a specific valley, a chimney flashing, or a wind-damaged slope. The crew will still protect landscaping and stage tools, but the tear-off is surgical. They lift surrounding shingles carefully to avoid breaking sealed tabs, then weave new shingles into the existing field. Color match will never be perfect, even within the same manufacturer’s line, because sun fades the existing roof. Most homeowners prefer a tight repair with a slight color blend over a heavy patch that stands out.
A good shingle roofing contractor will be candid about when repair is throwing good money after bad. If granules are sparse across large areas, the fiberglass mat is exposed, shingles are curling, or there are multiple leaks across planes, repairs turn into whack-a-mole. Once a roof crosses that line, investing in a complete roof shingle installation pays off in fewer disruptions and a stronger warranty.
Warranties and paperwork that actually matter
There are two layers of warranties: the manufacturer’s warranty on the shingles and accessories, and the workmanship warranty from your contractor. Many manufacturers offer upgraded warranties when you install a full system of their components and hire a credentialed installer. Read the fine print. Misplaced nails, insufficient ventilation, and overdriven fasteners are common reasons claims get denied. Ask your contractor to document deck repairs and ventilation changes with photos. That file makes future warranty discussions easier.
The workmanship warranty length varies by contractor. Five years is common, some offer ten. The value depends on the company’s stability and reputation more than the number printed on the page. A small, well-run firm with a track record in your town is often a safer bet than a “lifetime” promise from a pop-up that chases storms.
What can go sideways and how pros handle it
Surprises happen. Hidden rot along an eave can https://erickbzmo109.timeforchangecounselling.com/how-to-maintain-warranties-on-your-shingle-roof-replacement double the lumber time. An afternoon thunderstorm can roll in even with a clean forecast. The difference between a competent crew and an unprepared one shows fast. Pros keep extra plywood and framing lumber on the truck. They stage additional tarps and use temporary peel-and-stick membranes to seal unexpected openings before rain hits. They also communicate: a quick heads-up that the day will run long or that a change order is needed for decking replacement keeps trust intact.
One memorable project involved a second-story dormer with a flat transition that had leaked for years. The homeowner suspected the shingles. Once we opened it up, we found poor framing, no slope on the transition, and a badly installed skylight. We reframed a slight pitch, added tapered insulation, ran ice and water up the sidewalls, and used a low-slope membrane under the shingles at the transition. The shingles were the finish, but the fix lived under them. The lesson: many “shingle problems” are actually detail problems with water management.
Your role on installation day
The best way to help is to prepare the site, communicate preferences, and give the crew clear access. Move vehicles, secure pets, and clear the areas below eaves. If you have special concerns, share them in the morning when the foreman can build them into the plan. If you work from home, pick a quiet corner or step out during tear-off. You do not need to babysit the crew, but being available for quick decisions saves time and prevents assumptions.
After the crew leaves: cleanup, magnet sweeps, and first rain check
Most companies perform a thorough cleanup: blowing off driveways and patios, picking up larger debris, and running magnets along walkways and in planting beds. Nails hide in grass and mulch. I prefer to run a magnet again the next day when everything has settled. If you step on a stray, let the contractor know. They will usually stop by for another sweep.
When the first rain hits, look in the attic with a flashlight. Trace along valleys, around chimneys, and below skylights. A dry attic on the first rain is the best confirmation of a tight roof. If you see moisture, take photos and call immediately. The faster the response, the easier the fix.
Cost drivers you can actually control
While material prices fluctuate with oil and supply chains, homeowners can influence certain cost drivers. Complexity is the big one. Multiple layers to tear off, lots of penetrations, and steep slopes drive labor hours. Replacing skylights during roof shingle installation is often more cost-effective than calling someone back a year later. Upgrading ventilation is another value play: it is relatively affordable compared to the overall roof and protects the entire system. Finally, choosing a shingle tier that matches your home’s exposure and wind zone pays off. A basic three-tab might be cheap, but in regions with frequent wind events, a laminated architectural shingle with a higher wind rating and better sealant is money well spent.
When to schedule roof shingle replacement
Spring and fall tend to be the sweet spot in many climates. Temperatures are moderate, sealant activation is predictable, and crews are not yet stretched thin by storm response or extreme heat. If you need roof shingle repair in winter, it can be done, but plan for follow-up in milder weather to verify seal-down and finish paint touch-ups on flashings. In summer, early starts and later finish times help crews avoid the worst heat. If you are replacing gutters as well, coordinate the schedules so gutters come after roofing, not before. That sequencing prevents unnecessary damage and ensures drip edge and gutter apron integrate correctly.
A simple homeowner prep list for a smoother day
- Move cars from the driveway and clear 20 feet from the eaves for falling debris. Bring patio furniture and grills under cover or away from the house. Identify and mark fragile landscaping; show the foreman sprinkler heads and low-voltage lighting. Secure pets indoors and plan for noise if you work from home. Confirm power outlet locations and share any concerns about attic items, satellite dishes, or skylights.
The payoff: a quiet roof that disappears into the background
A successful shingle roofing project fades from your mind. That is the goal. Water sheds, attic air moves, and the home stays comfortable. The roofline looks crisp from the curb without drawing attention to itself. Depth of color, straight shadow lines, tight ridges, and clean flashing details are the visible hallmarks. The invisible part is the confidence you feel when a storm rolls through and you do not flinch.
If you are preparing for installation day, choose a shingle roofing contractor who explains their process in plain terms, invites your questions, and shows their work with photos. Roofs do not need drama. They need care at the edges and the patience to do each step in order. When that happens, roof shingle installation becomes one of the most satisfying home upgrades you can make, precisely because you rarely think about it again.
Express Roofing Supply
Address: 1790 SW 30th Ave, Hallandale Beach, FL 33009
Phone: (954) 477-7703
Website: https://www.expressroofsupply.com/
FAQ About Roof Repair
How much should it cost to repair a roof? Minor repairs (sealant, a few shingles, small flashing fixes) typically run $150–$600, moderate repairs (leaks, larger flashing/vent issues) are often $400–$1,500, and extensive repairs (structural or widespread damage) can be $1,500–$5,000+; actual pricing varies by material, roof pitch, access, and local labor rates.
How much does it roughly cost to fix a roof? As a rough rule of thumb, plan around $3–$12 per square foot for common repairs, with asphalt generally at the lower end and tile/metal at the higher end; expect trip minimums and emergency fees to increase the total.
What is the most common roof repair? Replacing damaged or missing shingles/tiles and fixing flashing around chimneys, skylights, and vents are the most common repairs, since these areas are frequent sources of leaks.
Can you repair a roof without replacing it? Yes—if the damage is localized and the underlying decking and structure are sound, targeted repairs (patching, flashing replacement, shingle swaps) can restore performance without a full replacement.
Can you repair just a section of a roof? Yes—partial repairs or “sectional” reroofs are common for isolated damage; ensure materials match (age, color, profile) and that transitions are properly flashed to avoid future leaks.
Can a handyman do roof repairs? A handyman can handle small, simple fixes, but for leak diagnosis, flashing work, structural issues, or warranty-covered roofs, it’s safer to hire a licensed roofing contractor for proper materials, safety, and documentation.
Does homeowners insurance cover roof repair? Usually only for sudden, accidental damage (e.g., wind, hail, falling tree limbs) and not for wear-and-tear or neglect; coverage specifics, deductibles, and documentation requirements vary by policy—check your insurer before starting work.
What is the best time of year for roof repair? Dry, mild weather is ideal—often late spring through early fall; in warmer climates, schedule repairs for the dry season and avoid periods with heavy rain, high winds, or freezing temperatures for best adhesion and safety.