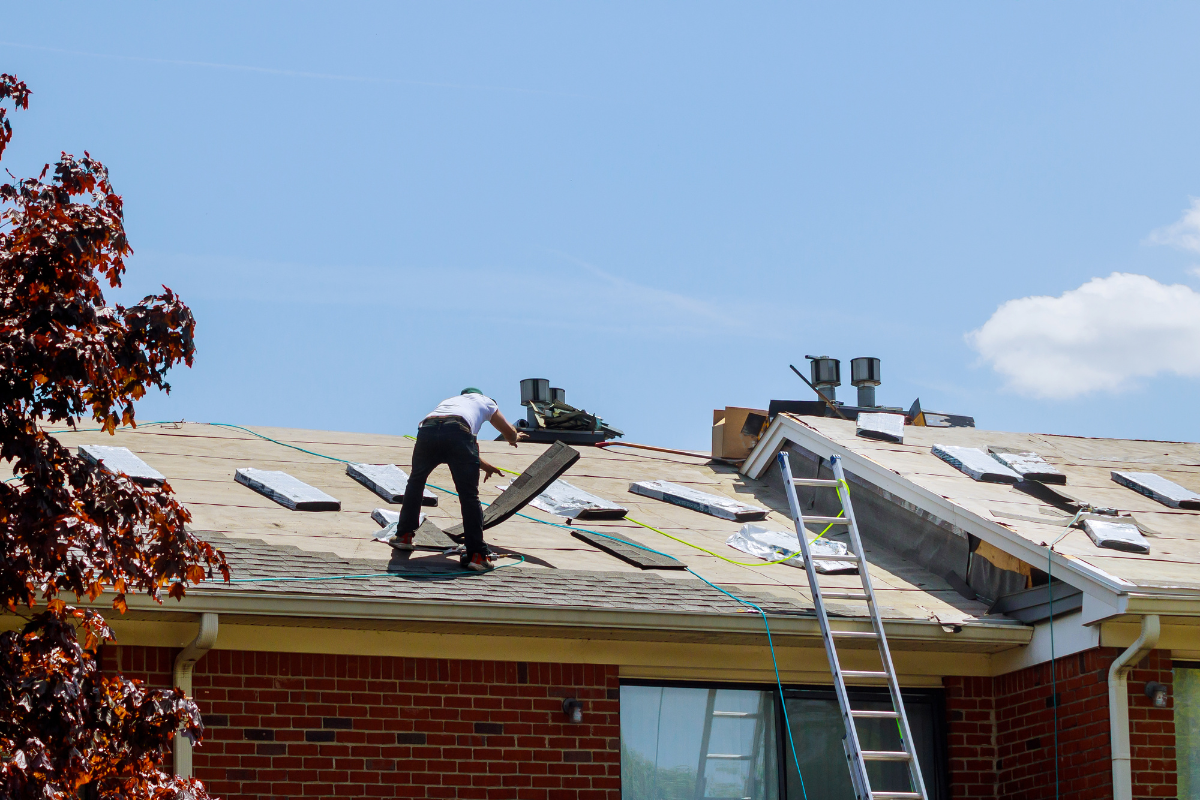
Replacing a shingle roof looks straightforward from the ground. Tear off, underlayment, shingles, flash the penetrations, call it a day. The reality has more moving parts, and the least visible ones can cause the most trouble: permits, codes, and inspections. A clean, code-compliant project protects your home, your wallet, and your peace of mind. Skipping or guessing on the regulatory side can get you fined, force a re-do, or void your insurance when you need it most.
I have spent years on job sites, at permit counters, and on the phone with inspectors. The difference between a smooth roof shingle replacement and a weeks-long headache usually happens before a single shingle is lifted. You do not need to become a building code savant, but you do need to understand the framework and make a few smart choices.
Why permits matter more than people think
A roof is a life-safety system. It manages water, wind, and fire exposure for the entire structure. Most jurisdictions treat roof shingle replacement as a permitted project because it affects the weather barrier, the structural deck, and potentially the fire classification of the roof assembly. A permit ensures a second set of eyes will verify that the work meets the local adaptation of the International Residential Code (IRC) or International Building Code (IBC), plus energy and wind requirements.
Permits also tie into appraisal, insurance, and resale. I have seen insurers deny wind or hail claims because the last replacement happened without a final inspection. Municipalities have also held up closings until “open permits” and “unpermitted work” were resolved with as-built inspections or partial tear-offs. Spending a couple hundred dollars and an hour at the permitting office beats those scenarios every time.
What triggers a permit for shingle roofing
The threshold varies by city and county, but several common triggers come up again and again.
Replacement of the roof covering. If you are swapping out layers or changing materials, most places require a permit. Even like-for-like re-roofing usually needs one, especially if you are tearing off down to the deck.
Structural changes. Sistering rafters, replacing rotten sheathing beyond a defined percentage, altering truss members, or adding new skylights typically require documentation and in some cases engineer approval.
Energy or ventilation modifications. Adding insulation above the deck, changing ventilation approach, or installing a radiant barrier can bump your project into additional code checks.
Historic districts. Even simple roof shingle repair can trigger review if you live in a designated district. Expect oversight on shingle style, color, and flashing details visible from the street.
Wildland-urban interface and high wind zones. In wildfire-prone or hurricane-prone areas, roofing work must meet enhanced standards. Permitting helps enforce those upgrades.
Some municipalities allow minor shingle roof repair without a permit if the affected area is small and not structural. The cutoff might be 100 square feet or 10 percent of the roof surface. Verify in writing. A phone conversation that sounded permissive won’t sway a code enforcement officer later.
Where codes come from, and which ones matter
Two national model codes typically drive shingle roofing requirements:
International Residential Code (IRC). Governs one- and two-family dwellings and townhouses of limited height. The roofing provisions address allowable materials, fastening, underlayment, ice barriers, ventilation, flashing, and fire classification.
International Building Code (IBC). Applies to commercial buildings and larger residential structures. Roofing on multifamily or mixed-use properties may fall under the IBC.
Jurisdictions adopt a specific edition, often with amendments. A city might say “IRC 2018 with local amendments.” Those local amendments can be decisive, such as beefed-up underlayment in high wind regions or mandatory ice barriers in snow zones.
Additional layers include:
- Energy code (IECC or state equivalent), which can affect attic ventilation and insulation interactions. Manufacturer instructions, which codes often reference as minimum standards. If the shingle maker requires six nails per shingle in high wind areas, that becomes enforceable. Fire codes and ratings. Class A fire rating for roof coverings is the norm in many regions, and some wildland-urban interface areas require it.
Ask your building department for the adopted code edition and local amendments, then download the sections that apply to roof coverings and ventilation. A shingle roofing contractor with a permit track record will already have this dialed in, but you should still know the basics.
How jurisdictions interpret common roofing details
Building departments read the same code text, but interpretations vary. These are the hot spots I see most often.
Layers vs. tear-off. Some codes allow a second layer of asphalt shingles over a sound deck. Many coastal and high wind areas prohibit overlays entirely. Inspectors dislike overlaying because hidden deck damage goes uncorrected and wind performance suffers. Tear-off to the deck is increasingly the default.
Nailing patterns and quantities. Four nails per shingle is standard in moderate conditions. High wind zones move to six nails, with precise placement at the manufacturer’s nail line. Inspectors look for shanked nails that penetrate the deck by at least 3/4 inch and reject overdriven nails that cut the mat.
Ice barrier location. Where the average January temperature is below freezing, many codes require an ice barrier from the eave to at least 24 inches inside the warm wall line. Roof geometry can complicate this. On a low slope with a deep overhang, that might be two courses of self-adhered membrane.
Underlayment type on low slopes. For slopes from 2:12 to 4:12, most codes need two layers of felt lapped in a specific manner or a self-adhered underlayment. Below 2:12, shingles are typically not permitted, pushing you to a different roof covering.
Valley treatment. Open metal valleys and closed-cut shingle valleys are both acceptable if installed per manufacturer specs. In snow country, some inspectors insist on W-style valley metal to avoid water tracking under shingles.
Drip edge. More jurisdictions now require drip edge at eaves and rakes, with specific overlaps and nail spacings. Inspectors sometimes want drip edge installed under the underlayment at the rakes but over the underlayment at the eaves. Others accept underlayment over both. Confirm locally.
Ventilation math. The standard is 1 square foot of net free vent area per 150 square feet of attic floor, or 1 per 300 with a balanced system and vapor retarder. Inspectors check for baffles at the eaves to maintain airflow above insulation, and they will flag bath fans venting into the attic instead of outdoors.
Flashing re-use. Many homeowners ask to re-use existing step flashing. Plenty of inspectors require new step flashing with any shingle roof replacement, since removing the old shingles disturbs the integration. Expect to replace counterflashing as needed and grind into mortar joints on masonry.
The permitting process from the contractor’s side and yours
If you hire a shingle roofing contractor, insist the company pulls the permit in its name. The party listed on the permit shoulders responsibility for code compliance and inspections. When homeowners pull homeowner permits to save a few dollars or because the contractor is not licensed in that jurisdiction, liability shifts. That’s rarely a good trade.
You can expect the sequence to look like this:
Scope confirmation. Decide whether the project is tear-off, overlay, or repair. Note any structural issues, venting changes, skylights, or deck replacement that may require plan notes.
Permit application. This can be online or at the counter. You will provide the address, parcel number, contractor license info, estimated valuation, and brief description. Some municipalities request a simple diagram indicating slope, area, and ventilation strategy.
Plan review. For straightforward shingle roof replacement, review might be over-the-counter. If structural details or energy code trade-offs are involved, expect a day or two.
Permit fee. Fees scale with valuation or are set as flat rates per square of roofing. Budget in the range of 50 to 300 dollars for a single-family re-roof in most places, higher in big metros.
Inspections. Usually pre-roof (after tear-off, before underlayment), in-progress, and final. In some jurisdictions, inspectors want to see the deck nailing and any replaced sheathing. Others focus on ice barriers, drip edges, flashings, and ventilation.
Close-out. The contractor should submit any required photos or documents and verify the permit status reads “closed” or “finaled.” Keep a copy with your house records and share it with your insurer.
Planning details that keep the inspector on your side
Inspectors are not trying to fail you. They are trying to prevent water intrusion and wind damage, and they are trained to spot patterns that cause callbacks. If you get the fundamentals right, you rarely have friction.
Deck condition. After tear-off, walk the sheathing with a framing hammer. Soft spots, delamination, and excessive deflection need replacement. Patch pieces should land on rafters, not float. Fasten per code, usually 8d nails at 6 inches on edges and 12 inches in the field.
Fastener length and type. Match nails to deck thickness. Into 1/2-inch OSB, a 1-1/4-inch roofing nail is typical. In thicker plank decks or over old nail fields, step up to 1-1/2-inch. Stainless or hot-dipped galvanized nails are standard in coastal environments.
Underlayment selection. Synthetic felts have become the norm for full-deck coverage. Self-adhered ice barriers at eaves and valleys are common in cold climates. Follow the lap and cap-nailing patterns. A wavy underlayment is an immediate red flag.
Flashing integration. Sequence matters. Step flashing each course at sidewalls, then add counterflashing into the masonry reglet or siding. Kickout flashings at the base of sidewalls stop water from running behind the siding. Inspectors look for kickouts because their absence is a top cause of rot at the eave-wall intersection.
Vent balance. If you upgrade the ridge vent, confirm intake area at the soffits. Installing a larger exhaust without adequate intake depressurizes the attic and pulls conditioned air from the living space, which raises energy costs and can cause moisture issues. Baffles at every rafter bay prevent insulation from choking intake.
Drip edge and starter. Set the drip edge, then install starter strip shingles with the adhesive strip aligned to seal the first course. Inspectors sometimes pull at the starter to verify adhesion.
Nailing line discipline. Place nails in the defined zone. High nails are a short path to blow-offs. Low nails can cause leaks in the cutouts. Use a compressor regulator and check depth against manufacturer tolerance.
Regional nuances worth anticipating
Code language is broad enough to cover many climates, but local practice adapts for the conditions that punish roofs the hardest. What passes in Phoenix might fail in Portland.
Snow and ice zones. Expect strict enforcement of ice barrier width, valley protection, and ventilation. In northern climates, I have used two full rows of ice shield at eaves, kept metal valleys, and sized ridge vents to avoid condensation under long cold snaps. Heat cables may be allowed but are a last resort. The building department will remind you that air sealing the ceiling plane and balancing ventilation fix most ice dams.
High wind and coastal zones. Six nails per shingle, enhanced starter strips with double adhesive, sealed hip and ridge caps, and high-wind-rated shingles are common. Some counties require documentation of the shingle’s ASTM D3161 or D7158 rating. Corrosion-resistant fasteners and metals are mandatory near salt air. Inspectors may ask for documentation of the wind zone the product is rated for.
Wildfire-prone areas. Class A shingles over approved underlayment assemblies, metal spark arrestors at vents, and ember-resistant soffit venting can appear on permit notes. Inspectors will flag untreated wood shake replacements and any unprotected gable vents.
Seismic regions. Roofing itself is less about seismic loads, but inspectors sometimes eye heavy stacked materials on the roof. With asphalt shingles, the more relevant issue is the condition of roof-to-wall connections exposed during tear-off, especially on older homes.
Historic districts. Material, exposure, ridge profiles, and even color can be regulated. I have presented sample boards and mockups to committees that review aesthetics. Build time into your schedule for that step.
When a repair counts as a replacement
Homeowners often ask for shingle roof repair to avoid a full permit process, especially after a hailstorm or wind event. Insurers may pay for spot repairs when damage looks minor. Here is the catch: localized repairs can be acceptable, but once you cross a threshold of replacement, codes treat it as re-roofing. Even if you stay under the percentage limit, a patchwork of new shingles next to brittle, sunbaked shingles may not seal well, and color mismatch can be glaring.
A practical rule of thumb: if more than one or two slopes need work, or if the roof is over 15 years old, consider a full roof shingle replacement. You will get a uniform warranty, a code-compliant assembly, and a clean inspection record. A seasoned shingle roofing contractor can write a scope that matches the code thresholds and avoids half-measures that fail a year later.
Material choices that intersect with code
Shingle type and accessory choices can simplify inspections and boost performance.
Impact-resistant shingles. In hail regions, IR shingles rated under UL 2218 can cut insurance premiums and reduce future claims. Inspectors do not require them, but adjusters and underwriters like the documentation.
Algae-resistant granules. Coastal and humid climates benefit from AR shingles with copper-infused granules. Code does not mandate them, but they keep the roof looking clean longer and avoid homeowner pressure-washing that can void warranties.
Cool roof options. Some jurisdictions, such as parts of California under Title 24, require cool-rated shingles in certain conditions. If you are replacing in a zone with energy code cool roof requirements, choose shingles with the needed solar reflectance and thermal emittance ratings.
Underlayment upgrades. A full-coverage self-adhered underlayment is tempting for leak defense, yet it changes the roof’s drying behavior. In hot climates, a fully sealed deck can trap heat and moisture. Inspectors do not prohibit it, but they expect you to pair it with proper ventilation and pay attention to shingle warranty requirements for high-temperature exposure.
Fastener coatings. Inland, electro-galvanized nails are common. Near the coast or industrial zones, hot-dipped galvanized or stainless nails are smarter. Inspectors in marine exposure areas will check for the correct coating.
Documentation: your quiet superpower
A neat package of documents earns goodwill and speeds inspections.
- Permit and inspection card, printed or accessible online, at the job site. Product data sheets for shingles, underlayment, ice barrier, ridge vent, and drip edge that show compliance with ASTM standards and wind ratings. Ventilation calculation sheet, including attic square footage and net free vent area for intake and exhaust. Photos of the bare deck, replaced sheathing, ice barrier at eaves and valleys, and step flashing in progress. If weather forces you to dry-in ahead of an inspection, these photos can save you. Final invoice and warranty registration, with the contractor’s license number and permit number noted.
Keep digital copies with your home records. Years later, when a buyer asks or an insurer checks, you will have facts, not fuzzy recollections.
Scheduling and weather windows
Permits set the legal framework, but weather rules the calendar. If an inspector wants to see the deck before underlayment and a storm is forecast, coordinate closely. Many departments allow photo documentation during emergencies and then inspect the next available day. Your contractor should have breathable tarps and temporary dry-in materials ready. A rushed dry-in that traps water under a membrane can cause more damage than the original leak.
On busy weeks, inspectors stack 10 to 15 stops a day. Morning calls get priority. If you can tear off at sunrise, have the deck ready for inspection mid-morning, then dry-in and shingle by afternoon, the project moves efficiently. Multi-day jobs need secure staging and a plan for overnight water protection.
Costs and realistic expectations
Permits add cost and time, but the numbers are manageable. For a typical single-family shingle roof replacement of 20 to 35 squares:
- Permit and inspection fees often land between 100 and 400 dollars, higher in metro cores. Material and labor can vary widely, from 350 to 800 dollars per square in many markets, more with complex roofs, premium shingles, or significant sheathing replacement. Deck replacement costs run roughly 45 to 90 dollars per sheet installed, depending on access and thickness, and you may replace anywhere from a couple of sheets to 20 percent of the deck on an older home. Upgrades like ridge vents, ice shield, and metal valley components add modestly to cost and substantially to performance.
Expect your shingle roofing contractor to price unknowns explicitly. A line item like “replace up to 5 sheets of sheathing at X per sheet” keeps surprises contained.
Choosing the right shingle roofing contractor for a code-heavy project
Roofing is not a commodity service. On paper, bids can look similar. In practice, execution diverges. I look for a contractor with these traits:
Permitting competence. They pull the permit without prompting, know your jurisdiction’s adopted code edition, and can explain local amendments in plain language.
Manufacturer alignment. They are certified or credentialed with a major shingle brand and can offer enhanced warranties that require specific underlayments, ventilation, and accessory components.
Detail fluency. They talk about drip edge laps, kickout flashing geometry, and nail placement without consulting a manual. When you ask about low-slope sections or tricky valleys, they have an answer and a photo from a past job.
Documentation habits. Their proposal lists product names, fastener types, underlayment specs, and ventilation approach. Their close-out packet includes photos and the final inspection record.
Weather discipline. They monitor forecasts and will postpone rather than gamble. If they must dry-in ahead of an inspection, they document it.
In a market with recurring hail or wind events, storm chasers flood the area after a big blow. Some are excellent. Many are not. Vet licenses, insurance, references, and local inspection history. If a contractor proposes skipping the permit to save time, that is useful information about their judgment.
A homeowner’s preparation checklist that actually helps
- Verify code and climate requirements with your building department, including wind, snow, and wildfire considerations. Decide on tear-off vs. overlay. If you have layers, plan for a full tear-off down to the deck. Confirm ventilation math and product choices with your contractor. Get intake and exhaust balanced. Require the contractor to pull the permit and share inspection milestones. Make sure their name is on the permit. Set a photo documentation expectation for deck condition, flashing, and ice barrier.
This list is short on purpose. If you nail these items, the rest of the project usually falls into place.
Edge cases and judgment calls
Every roof throws a curveball. Two examples illustrate how codes mix with practical decisions.
A low-slope porch tied into a steeper main roof. Shingles on a 2:12 porch meet the bare minimum if you follow the double underlayment rules. In practice, water lingers and capillaries upward under wind. I prefer a self-adhered membrane on the porch, then transition under counterflashing to shingles on the main slope. Some inspectors will ask you to show the detail or accept photos. It costs a bit more, but it saves callbacks.
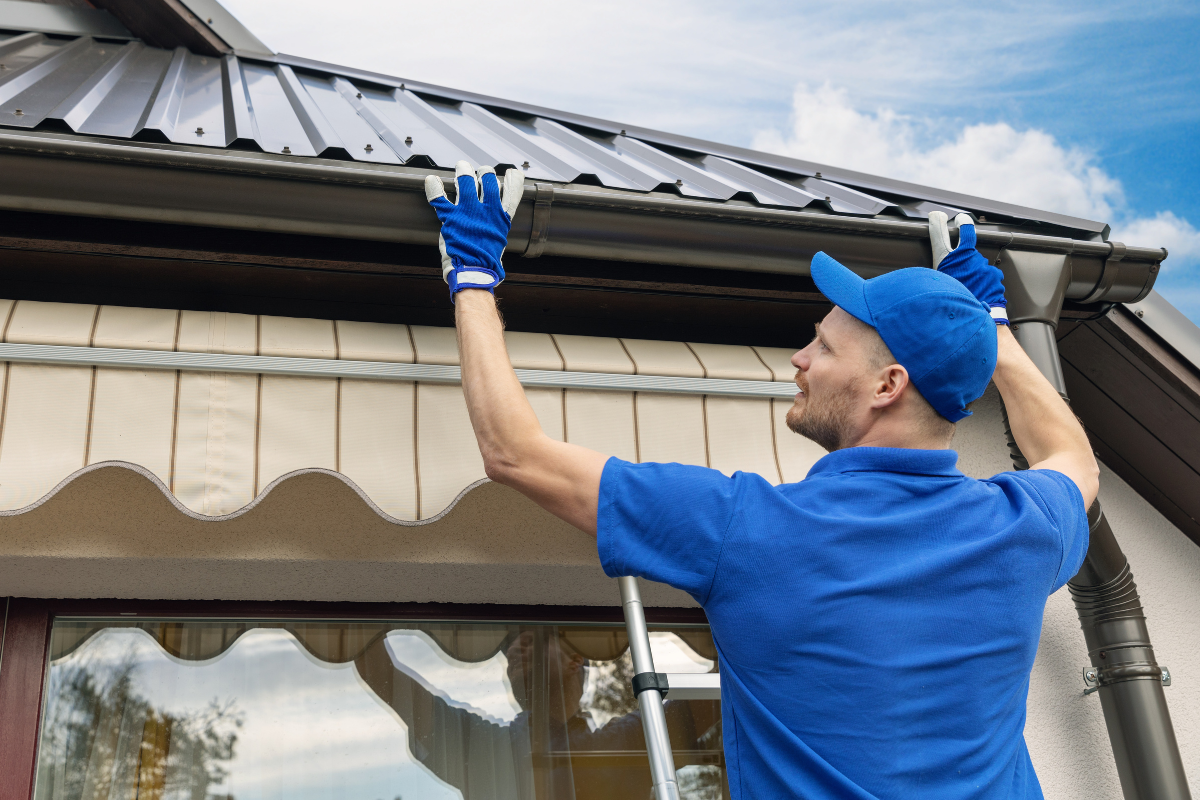
Re-using existing gutters and fascia that are marginal. The code does not address gutter condition, but drip edge and starter rely on a stable edge. If fascia is punky or gutters are sagging, the new shingles will not seal perfectly at the eave and wind can get under the first course. Replacing fascia and rehanging gutters during the roof job avoids fussing later. The inspector might not fail you for old gutters, but you will have built a better system.
What to do if an inspector flags something
Treat a correction notice as part of the process. Read the note carefully, ask clarifying questions, and fix the issue before covering it up. Common corrections include missing kickouts, inadequate nailing, insufficient ice barrier coverage, and lack of intake ventilation. If you disagree with an interpretation, request a meeting with the chief inspector or provide manufacturer documentation that supports your method. Keep the tone professional. I have won several close calls by calmly presenting a detail from the shingle manufacturer’s installation guide that aligned with the code’s reference standard.
The payoff: a roof that lasts and paperwork that protects
A properly permitted, code-aligned shingle roof outlasts a slapdash job by years. The shingles lay flatter. The flashings shed water instead of channeling it inside the wall cavity. The ventilation keeps the attic dry and the shingles cooler. Your insurer has a record they can trust, and a future buyer’s inspector finds a tidy https://www.expressroofsupply.com/ permit trail instead of question marks.
Permits and codes can feel like bureaucracy from the outside. From the roof deck, they look like a checklist of details that keep weather out and value in. If you give them the attention they deserve at the start, the rest of the roof shingle installation goes faster, with fewer surprises and a better finish. And when the next big wind blows or the snow stacks up in February, you will not be wondering whether a corner got cut. You will be listening to the quiet, which is what a good roof gives you.
Express Roofing Supply
Address: 1790 SW 30th Ave, Hallandale Beach, FL 33009
Phone: (954) 477-7703
Website: https://www.expressroofsupply.com/
FAQ About Roof Repair
How much should it cost to repair a roof? Minor repairs (sealant, a few shingles, small flashing fixes) typically run $150–$600, moderate repairs (leaks, larger flashing/vent issues) are often $400–$1,500, and extensive repairs (structural or widespread damage) can be $1,500–$5,000+; actual pricing varies by material, roof pitch, access, and local labor rates.
How much does it roughly cost to fix a roof? As a rough rule of thumb, plan around $3–$12 per square foot for common repairs, with asphalt generally at the lower end and tile/metal at the higher end; expect trip minimums and emergency fees to increase the total.
What is the most common roof repair? Replacing damaged or missing shingles/tiles and fixing flashing around chimneys, skylights, and vents are the most common repairs, since these areas are frequent sources of leaks.
Can you repair a roof without replacing it? Yes—if the damage is localized and the underlying decking and structure are sound, targeted repairs (patching, flashing replacement, shingle swaps) can restore performance without a full replacement.
Can you repair just a section of a roof? Yes—partial repairs or “sectional” reroofs are common for isolated damage; ensure materials match (age, color, profile) and that transitions are properly flashed to avoid future leaks.
Can a handyman do roof repairs? A handyman can handle small, simple fixes, but for leak diagnosis, flashing work, structural issues, or warranty-covered roofs, it’s safer to hire a licensed roofing contractor for proper materials, safety, and documentation.
Does homeowners insurance cover roof repair? Usually only for sudden, accidental damage (e.g., wind, hail, falling tree limbs) and not for wear-and-tear or neglect; coverage specifics, deductibles, and documentation requirements vary by policy—check your insurer before starting work.
What is the best time of year for roof repair? Dry, mild weather is ideal—often late spring through early fall; in warmer climates, schedule repairs for the dry season and avoid periods with heavy rain, high winds, or freezing temperatures for best adhesion and safety.