Storm belts on the coasts and across the central plains have a way of testing every square inch of a roof. Hailstones the size of quarters can bruise shingles, eighty-mile-per-hour gusts can lift edges like a zipper, and flying debris from a neighbor’s fence puts punctures where you least expect them. Homeowners often realize too late that not all shingles are created equal. If you live where wind, hail, or driving rain shows up every season, impact-resistant shingles are not a luxury, they are a hedge against costly tear-offs and repeated insurance claims.
I have managed roof assessments after hurricanes, helped spec replacements for neighborhoods hit by late-spring hail, and stood in attics with homeowners who only discovered leaks when the drywall bubbled. The difference between a standard shingle roof and a well-chosen impact-rated system is not subtle. Better materials will not make a house invincible, but they dramatically shift the odds in your favor, especially when paired with careful roof shingle installation and maintenance.
What “Impact Resistant” Actually Means
Impact-resistant shingles are tested and rated under standards developed to simulate hail and debris strikes. The most referenced is UL 2218, which assigns a Class 1 through Class 4 rating. Class 4 is the highest level, achieved by dropping a two-inch steel ball multiple times from 20 feet onto specified locations. A shingle passes when it shows no ruptures or cracks that expose the mat. There is also FM 4473, which uses ice balls propelled at measured velocities to better mimic real hail. Insurance carriers commonly reference UL 2218 because it is widely adopted and consistent.
Those ratings focus on resistance to fracturing. That matters because cracks let water find pathways into the mat and nail penetrations. The test does not claim the roof will look perfect after hail, only that it will hold together and keep water out. In the field, I have seen Class 4 shingles with cosmetic scuffing and granule displacement after a big storm, but the shingles stayed intact and the decks remained dry. Homeowners avoided emergency tarps and the domino of interior repairs.
Anatomy of a Tougher Shingle
Most impact-rated shingles start with upgrades to the mat and reinforcement layers. Traditional asphalt shingles use either an organic felt mat or, more commonly today, a fiberglass mat. Manufacturers that target Class 4 performance typically use a heavier fiberglass mat bonded with modified asphalt. Polymer-modified asphalt, often SBS or similar elastomers, gives the shingle more flexibility. It bends instead of cracking when hit. Think of the difference between a stale cracker and a soft leather belt.
The surface granules also play a role. Ceramically coated minerals protect against UV and add fire resistance, but the way they are embedded affects how the shingle sheds hail energy. High-quality adhesives under the tabs and wider nailing zones help keep the shingle secured in high wind, which matters when gusts try to peel back edges after a hail burst.
On the premium end, some shingles incorporate mesh or woven scrims, and the heaviest designs use polymer or rubberized compounds. You will see names like SBS-modified, TPO-reinforced, or proprietary impact blends. Ignore the marketing gloss and look for a published Class 4 rating, then compare weight per square, nailing strip design, and whether the manufacturer allows high-wind warranties when installed with specific nails and underlayments.
Matching Shingle Types to Local Threats
“Storm prone” can mean different things. The right shingle roofing in the Texas Panhandle may not be the right choice for the Outer Banks. Hail zones demand puncture resistance and flexibility. Coastal wind zones demand strong sealants, larger nailing zones, and a roof system that resists uplift. Rainforest foothills demand impeccable water shedding and moss resistance.
If hail is common, prioritize UL 2218 Class 4 and look for thicker mats, SBS-modified asphalt, and field reports from local contractors. I like shingles that remain flexible in colder temperatures because spring storms often hit when ambient temperatures are still in the forties. A brittle shingle fails tests it might otherwise pass.
If wind is the top threat, look beyond impact ratings to the manufacturer’s wind warranty numbers. It is common to see 110 to 130 mph wind ratings, but these assume specific installation practices: six nails per shingle, a starter strip with proper adhesive, edge metal that overlaps correctly, and sometimes enhanced underlayments. Ask for documentation on the wind warranty conditions and verify that your shingle roofing contractor will follow them. I have inspected failures where the shingle itself was fine, but nails were too high and staples were used at the ridge, turning the cap into confetti.
In very rainy regions, water management makes or breaks performance. That means underlayment choices and flashing quality matter as much as the shingle. Impact-resistant shingles keep the top layer intact, but water still finds the weak details. Closed valleys with metal underlayment or woven https://maps.google.com/maps?ll=25.994871,-80.166664&z=16&t=m&hl=en&gl=US&mapclient=embed&cid=2326794835190123314 shingles hold up better in debris-laden runoff. Ice-prone eaves need an ice and water barrier, often two courses, to lock down the gutters and fascia transitions.
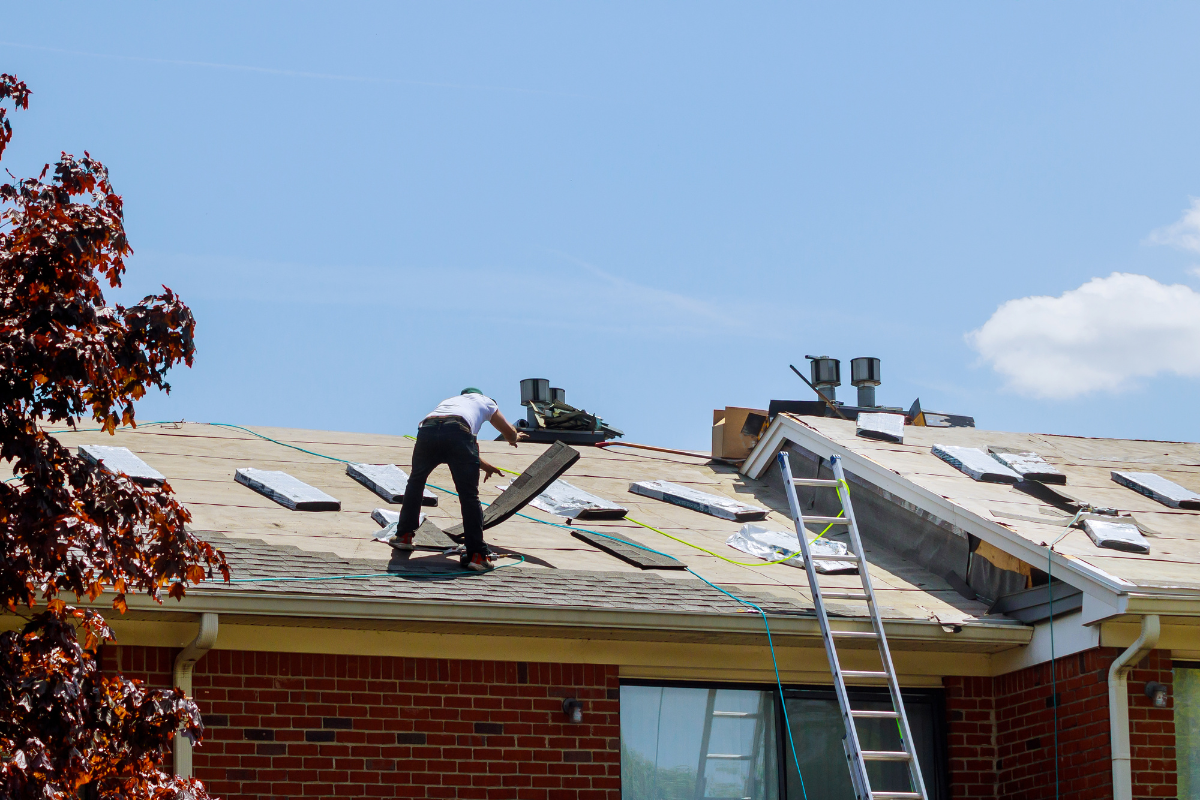
Underlayment, Decking, and Details That Carry the Load
No shingle can do the job alone. Impact-resistant designs add resilience, yet the roof behaves as a system. Plywood or OSB decking must be sound, firmly fastened, and dry. Re-nail decking to framing anywhere the fasteners have loosened. I have seen uplift damage that started because a few sections of deck were barely held by rusting nails.
Use high-quality underlayment. Synthetic underlayments resist tearing in wind, which is useful during installation and provides a secondary layer of defense. In hail regions, self-adhered ice and water barriers in valleys and around roof penetrations earn their keep. When hail bruises a shingle, capillary action can sneak water toward nails. A peel-and-stick membrane interrupts that path.
Ridge and hip lines deserve special attention. Some impact-rated systems include matching impact-resistant ridge caps, which are thicker and handle flex better. If you pair a Class 4 field shingle with a standard ridge cap, the ridge will often be the first failure point in a hail strike. Likewise, use metal step flashing at walls that overlaps cleanly, not roof cement gobbed into a corner. Sealants age, metal detail work does not.
Installation Craft That Survives Storms
The best material fails under sloppy work. Roof shingle installation in storm country should feel deliberate, not rushed. Start lines need to be straight, and courses must track evenly to keep nail lines in the reinforced zones. Nail placement is nonnegotiable. Every manufacturer shows a nailing strip or target area; miss high and you reduce wind resistance, miss low and you risk exposure.
In high-wind regions, six nails per shingle is the norm for the rated warranty, with nails driven flush and perpendicular. Overdriven nails cut the mat and reduce pull-through resistance. Underdriven nails hold shingles up off the deck. I carry a magnet when I inspect jobs to check for nails driven into the seams and to find nails on the ground, both signs the crew was fighting gun calibration.
Starter course and edge details are where uplift begins. Use the manufacturer’s starter shingles or field-cut starters with adhesive at the eave and rake edges. Overhangs at the eaves should be minimal, usually a half inch, to reduce the lever arm the wind can grab. Pair with a drip edge installed under the underlayment at the eave and over the underlayment at the rake, a small sequencing detail that prevents wind-driven rain from curling under the edges.
Roof penetrations are failure favorites. Vent pipes need snug boots, and satellite mounts should land on framing or on separate mounting systems, not directly through shingles in the field. After big storms, I often find leaks that trace back to an enthusiastic cable installer with a handful of lag screws and a tube of silicone. Keep that hardware off the roof plane if you can.
The Insurance Dimension: Credits and Claims
Insurers track localized losses closely, and many have learned that Class 4 roofs reduce claim frequency. In hail states, carriers often offer premium credits for impact-resistant shingles. The discount varies, typically 5 to 25 percent, and some carriers adjust deductibles or require specific documentation like UL 2218 labels or photographs during installation. It is worth calling your agent before you commit, to confirm which brands and models qualify and whether there are exclusions for cosmetic damage.
Cosmetic exclusions matter. After hail, you may see scuffs that do not penetrate the mat. Some policies with cosmetic exclusions will deny replacement if there is no functional damage. This is usually a fair trade, since the roof still protects the home, but homeowners should understand it up front. Ask your roofer to document pre-storm conditions and provide close-up photos of the shingle mat and granule coverage during the job. That file can smooth future conversations with an adjuster.
Cost Versus Value: When the Upgrade Pays
Impact-resistant shingles cost more than standard architectural shingles. The material premium ranges from modest to significant, depending on brand and features. For a typical 2,200 square-foot roof, I see installed cost differences on the order of $1,200 to $3,500 compared to non-rated architectural shingles, though coastal markets with labor shortages can push higher. If you live in a zone with hail every few years, the upgrade often pays for itself through fewer emergency repairs, longer intervals before roof shingle replacement, and insurance credits.
Durability gains also change timing. Standard roofs in hail alleys sometimes suffer enough bruising by year seven to warrant replacement. With a Class 4 system, I have seen roofs go 15 years and longer despite multiple storms. You still need shingle roof repair for isolated wind damage or flashing issues, but you avoid the full tear-off cycle. That cash flow difference, more than the upfront premium, should inform your decision.
Material Choices: Asphalt, Polymer, and Metal Lookalikes
Class 4 is not restricted to one material. Modified asphalt architectural shingles dominate because they balance cost, look, and performance. Designers who want slate or shake aesthetics can choose heavy multi-layered asphalt options that carry impact ratings and look sharp on steep pitches.
There are also polymer composite shingles that mimic shakes or slate. These often meet or exceed Class 4 and carry high wind ratings, with longer lifespans, but they cost more and require crews familiar with the product. In wildfire-prone areas that also see hail, some homeowners choose stone-coated steel shingles. Steel handles hail well in terms of puncture resistance, though it can dent, and noise is often managed through underlayment choices. For neighborhoods governed by strict aesthetic rules, architectural asphalt still wins the familiarity contest, and the best of those meet impact needs without homeowner association pushback.
Ventilation and Attic Health in Harsh Weather
Storm hardiness does not excuse poor building science. Roofs last longer when the attic stays within a few degrees of outdoor temperature in winter and expels heat in summer. Proper intake at the eaves and exhaust at the ridge reduces ice dam risk, limits deck movement, and preserves the asphalt binder. I have measured attic temperatures 30 degrees higher than ambient under poorly vented roofs during a summer heat wave; shingles baked prematurely, and sealant bonds failed. When you schedule roof shingle replacement, ask your contractor to calculate net free ventilation area and confirm you have balanced intake and exhaust. Upgrading to a continuous ridge vent and clearing blocked soffits can add meaningful years to your new roof.
Warranties Without Wishful Thinking
Manufacturers offer layered warranties: defects in materials, algae resistance, wind coverage, and in some cases, enhanced protection if you install a full system of their branded underlayments, starters, and ridge components. Read the fine print. A 130 mph wind rating often relies on six nails per shingle, specific starter strips, and a certain number of days for sealant to activate before a storm. Keep your invoice and a copy of the installation spec. If your shingle roofing contractor provides a workmanship warranty, get it in writing, with the term and what it covers.
Warranties are safety nets, not excuses for sloppy work. The fastest way to void coverage is to ignore installation instructions or skip components. I once saw a beautiful Class 4 shingle job undermined by a contractor who reused cracked step flashing. The roof met the letter of the shingle warranty but failed at a wall during the first sideways rain. The homeowner still had a repair bill.
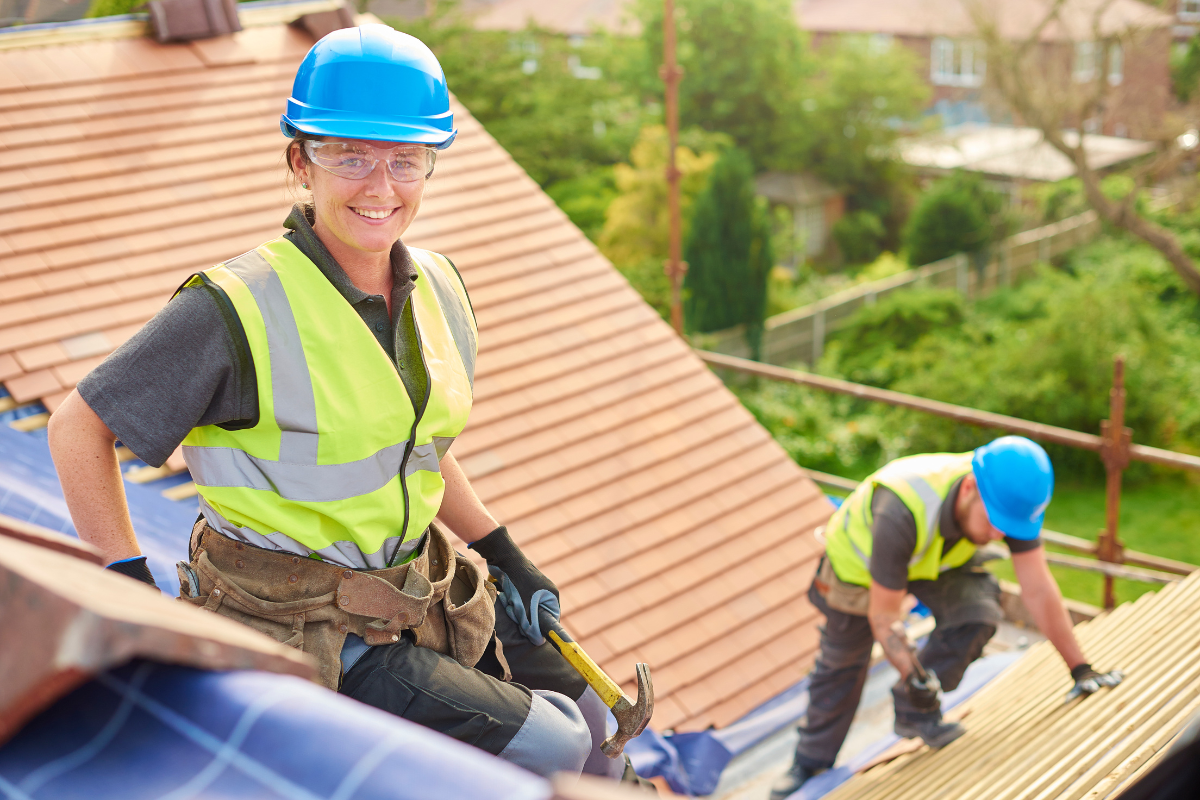
Working With a Contractor Who Knows Storm Roofs
Choose a shingle roofing contractor who can speak in specifics. When you ask about impact resistance, you want to hear them reference UL 2218 or FM 4473, explain wind warranty requirements, and describe how they handle valleys, ridge caps, and starter strips. Local experience matters. A contractor who repaired dozens of roofs after last year’s hail knows which brands held up. Ask to see photos of their roof shingle repair work after storms, not just pretty finished shots.
Crew supervision is underrated. I have watched good estimators lose control of results because the crew rushed an installation ahead of incoming weather. Responsible contractors never compromise nail placement to beat the rain. They stage tarps and protect exposed decking between days. If you are scheduling during storm season, build a little slack into the calendar. A dry day lost to caution can prevent a decade of headaches.
Maintenance That Keeps the Rating Real
Even the best shingle roof needs simple care. Clear debris from valleys and gutters twice a year, more often if you have tall trees. Debris acts like a sponge and a lever during wind gusts, and plugged gutters dump water back under the eaves. After major storms, walk the perimeter with binoculars. Look for lifted tabs, missing ridge pieces, or metal flashing that moved. Quick shingle roof repair when you spot a lifted cap or a small puncture preserves the integrity of the entire system.
Avoid aggressive roof cleaning methods that strip granules. If you have algae staining, look for gentle washes approved by the shingle manufacturer and consider algae-resistant shingle options in your next replacement cycle. When other trades work on the roof, such as HVAC techs or solar installers, insist on non-penetrating mounts or engineered systems that tie into framing with proper flashing. Casual foot traffic on hot days scuffs shingles and shortens life.
A Simple Field Test: When to Repair and When to Replace
After a storm, homeowners often ask whether they need roof shingle repair or full roof shingle replacement. It is rarely a guess. In hail, look for bruises that feel soft under finger pressure, cracks radiating from impact points, or areas where granules are gone and the black mat shows. A few isolated bruises on a Class 4 roof can be sealed or patched, especially at ridge lines, and the roof will keep its water-shedding ability. Widespread bruising across slopes, or damage concentrated on the windward face, often points to replacement.
With wind damage, the key sign is creased shingles where the tab folded back and broke the asphalt bond. A handful of creased tabs can be sealed with compatible adhesives. Rows of creases across multiple courses usually mean the wind got under a poor nailing pattern or failed sealant bond. In those cases, a reputable contractor will flag the system risk and recommend replacement even if some areas look intact.
The Buyer's Shortlist
- Verify UL 2218 Class 4 or FM 4473 ratings published by the manufacturer and recognized by your insurer. Confirm wind warranty requirements, including nail count, starter strips, and underlayments, and get those practices in the contract. Compare mat type, asphalt modification (SBS or similar), and ridge cap compatibility; insist on matching impact-rated caps. Inspect underlayment and flashing plan: ice and water barriers at eaves, valleys, and penetrations, with metal step flashing at walls. Choose a shingle roofing contractor with documented storm work, site supervision, and a workmanship warranty you can live with.
Real-World Examples: What Holds Up, What Fails
On a neighborhood in northern Colorado hit by two hail events three summers apart, we compared three roofs side by side. A standard architectural shingle installed five years earlier lost granules in swaths and showed mat fractures at multiple vents; the insurer approved replacement both times. The Class 4 roof next door, installed the same year, had scuffing around the ridge but no fractures; we sealed two lifted caps and replaced a single broken pipe boot. Across the street, a premium polymer composite that looked like slate showed no functional damage at all. On paper, all three had similar aesthetic curb appeal, but the maintenance costs told a different story.
On the Gulf coast, during a tropical storm with sustained winds in the fifties and gusts into the seventies, the most common failures were edge-related. Roofs with clean starter courses and adhesive-backed starters kept edges sealed; roofs with field-cut starters that lacked adhesive strips peeled along the rakes. Impact-resistant shingles did not stop uplift alone, but paired with the right edge details they stayed put while neighbors lost tabs. Homeowners who had documented six nails per shingle also fared better. It sounds trivial, yet it determines whether a wind warranty stays valid.
Timing Your Replacement Before the Next Storm
Scheduling matters. If your roof is already tired and storm season looms, lining up roof shingle replacement before peak hail or hurricane windows can save you an emergency premium. Manufacturers often run spring incentives, and contractors can give you more attentive installation when schedules are less chaotic. It is tempting to wait for the “big one” and hope for an insurance-funded replacement. I have seen that gamble pay off, but I have also watched small, preventable leaks turn into moldy insulation and stained ceilings after a modest storm. If your roof is leaking or past its reliable service life, upgrade now and let the next storm be the test you already planned for.
The Quiet Payoff: Peace of Mind During the Siren Hour
There is a moment, right after the weather radio squawks and the first stones hit the gutters, when homeowners start doing mental math. Do I have a tarp? Who do I call if water comes in? An impact-rated, properly installed shingle roof changes that calculus. You still respect the storm, but you are not gambling with plywood and paint. Your home becomes one less thing to fret over while you gather the pets and check on the neighbors.
Strong materials, careful roof shingle installation, honest maintenance, and a contractor who treats the details like they matter, even when no one sees them. That is the formula that has protected my clients’ homes across a decade of violent springs and long hurricane seasons. If you live where the sky throws trouble, choose a shingle system designed to take a hit, and partner with people who know how to put it down right. The next storm will come. Your roof can meet it on your terms.
Express Roofing Supply
Address: 1790 SW 30th Ave, Hallandale Beach, FL 33009
Phone: (954) 477-7703
Website: https://www.expressroofsupply.com/
FAQ About Roof Repair
How much should it cost to repair a roof? Minor repairs (sealant, a few shingles, small flashing fixes) typically run $150–$600, moderate repairs (leaks, larger flashing/vent issues) are often $400–$1,500, and extensive repairs (structural or widespread damage) can be $1,500–$5,000+; actual pricing varies by material, roof pitch, access, and local labor rates.
How much does it roughly cost to fix a roof? As a rough rule of thumb, plan around $3–$12 per square foot for common repairs, with asphalt generally at the lower end and tile/metal at the higher end; expect trip minimums and emergency fees to increase the total.
What is the most common roof repair? Replacing damaged or missing shingles/tiles and fixing flashing around chimneys, skylights, and vents are the most common repairs, since these areas are frequent sources of leaks.
Can you repair a roof without replacing it? Yes—if the damage is localized and the underlying decking and structure are sound, targeted repairs (patching, flashing replacement, shingle swaps) can restore performance without a full replacement.
Can you repair just a section of a roof? Yes—partial repairs or “sectional” reroofs are common for isolated damage; ensure materials match (age, color, profile) and that transitions are properly flashed to avoid future leaks.
Can a handyman do roof repairs? A handyman can handle small, simple fixes, but for leak diagnosis, flashing work, structural issues, or warranty-covered roofs, it’s safer to hire a licensed roofing contractor for proper materials, safety, and documentation.
Does homeowners insurance cover roof repair? Usually only for sudden, accidental damage (e.g., wind, hail, falling tree limbs) and not for wear-and-tear or neglect; coverage specifics, deductibles, and documentation requirements vary by policy—check your insurer before starting work.
What is the best time of year for roof repair? Dry, mild weather is ideal—often late spring through early fall; in warmer climates, schedule repairs for the dry season and avoid periods with heavy rain, high winds, or freezing temperatures for best adhesion and safety.